
Extend Your Vegetable Garden Into Fall
By Misty Kuceris, Horticulturalist, ©2019
Summer vegetable garden chores aren’t over when the last zucchini is picked and you still find some green tomatoes clinging to their vines, yet you know they won’t ripen any longer because the season is changing to fall. This is an exciting time to start planting cool season crops, what we call cold crops. But, before you can plant these cold crops, you need to clean up your garden.
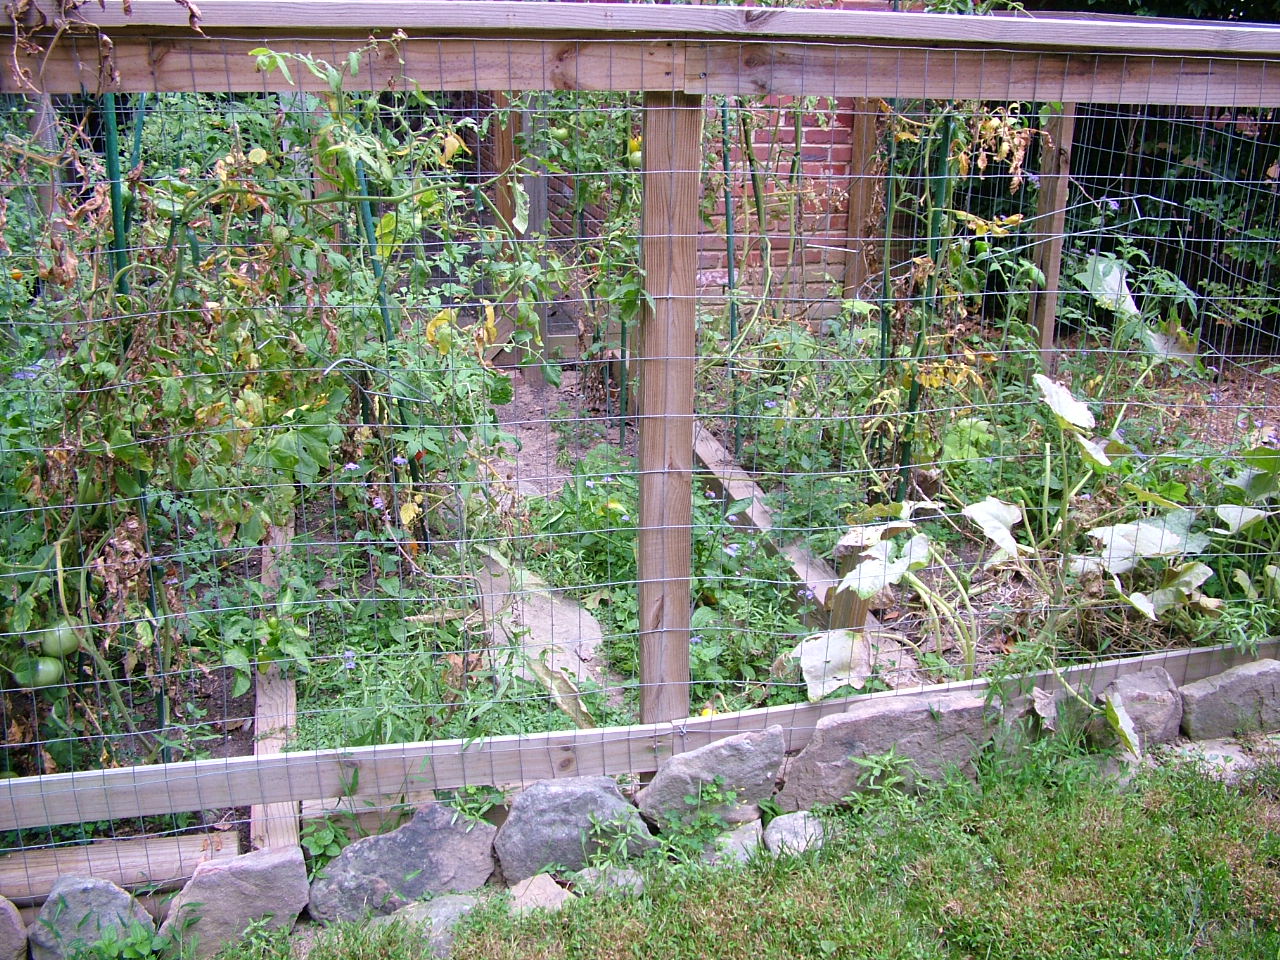 Right now when I look at my vegetable garden, all I see are the plants starting to die back. You can see from this picture that the veggies are beginning to die back. In this area of the garden, I grew tomatoes, cucumbers, and squash. Before I tear out any of these plants I’m going to harvest any vegetables that are left. Once I’ve completed that tasks, I’m going to remove the plants.
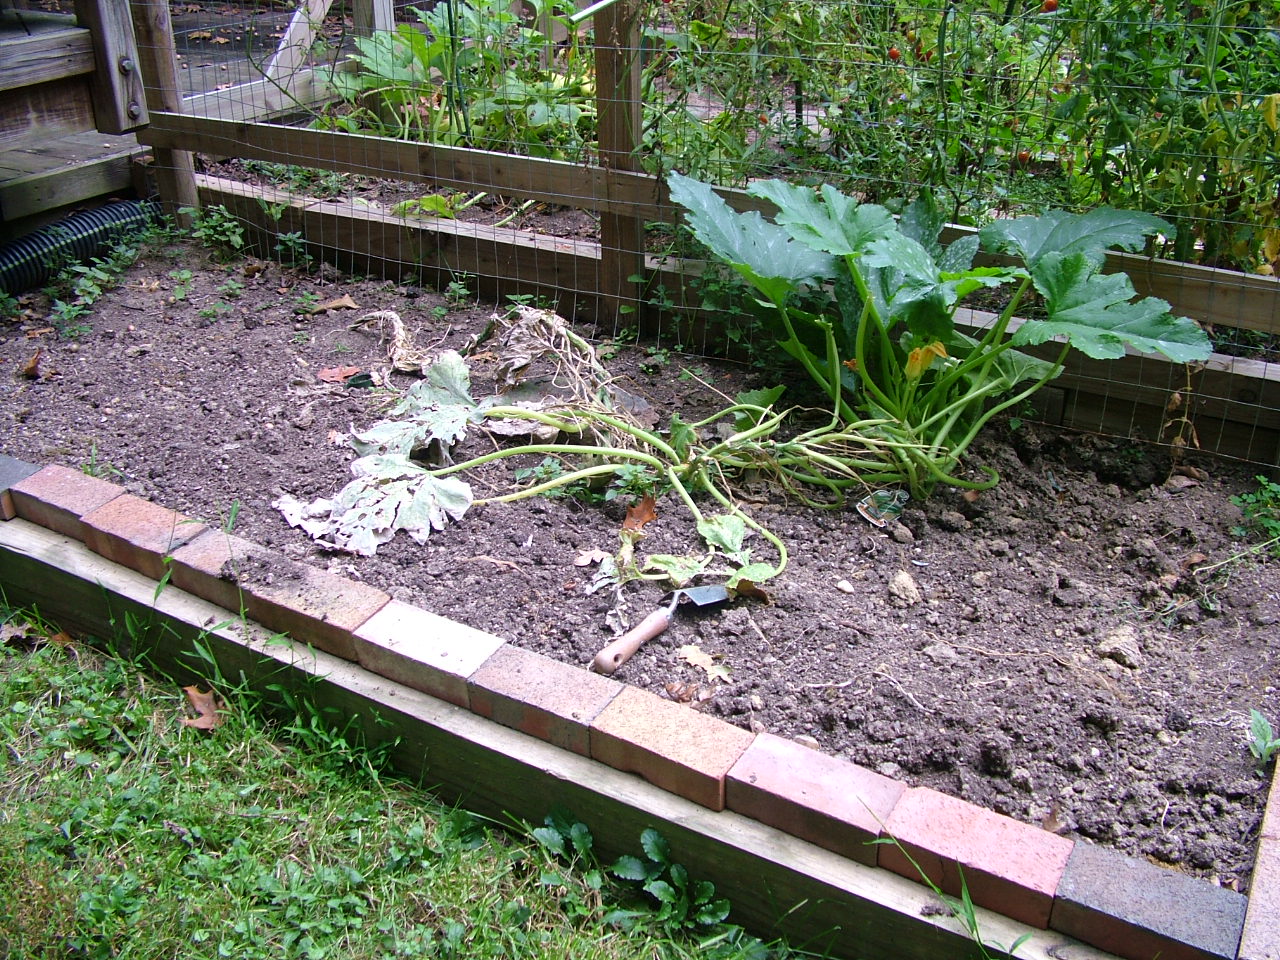 From this picture, you see that I’ve already started pulling out the veggies that were planted there. In that area, I had potatoes which were harvested.
Some people like to compost any plant debris or till it back into the soil. This past year I had a lot of powdery mildew on my cucumber plants so I won’t till them into the soil because the fungus can survive the winter months in the soil and infect vegetables leaves that I plant next spring.
Powdery Mildew
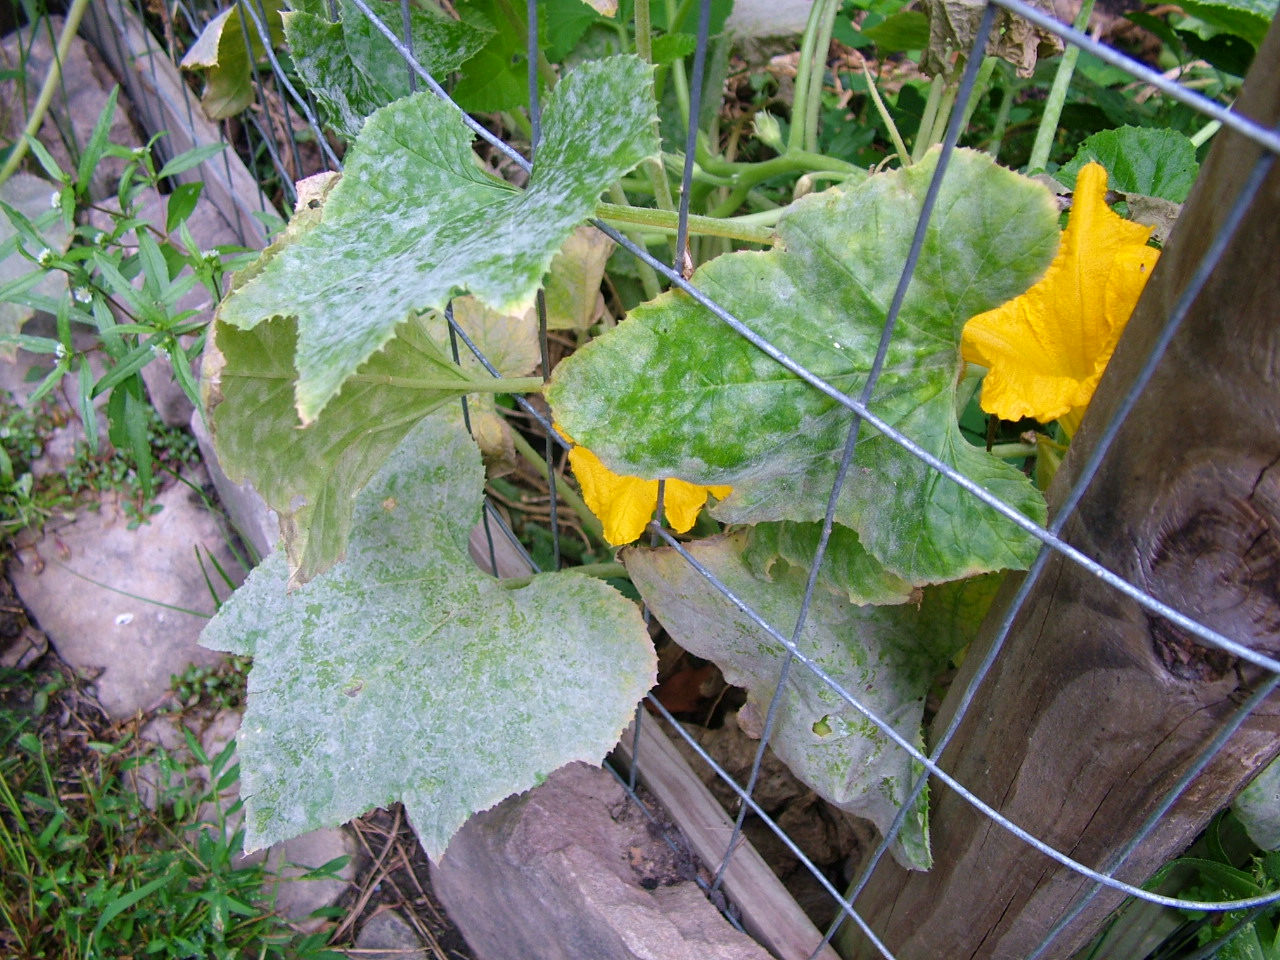
If you don’t know what powdery mildew looks like, just take a look at this picture of a squash leaf. It looks like someone took baking flour and sprinkled it on the plant. Powdery mildew can affect any plant, from your vegetables to your lawn grass.
As a matter of fact, one year I had a customer who came into Burke Nursery with her son and wanted me to lecture her son on not playing practical jokes like putting flour on her lawn. He’s standing there shaking his head indicating he didn’t do anything. I’m smiling knowing he’s right and explaining to her that her lawn was infected with a fungal infection called powdery mildew.
In addition to not tilling these plants into the soil or composting them, you want to remove all your tomato vines since they may have had an infection you didn’t know about and you don’t want that to remain in the soil as well. Also, you don’t want to compost your tomato plants because believe it or not, even in the compost bin, the seeds from any tomato plants you left on the vine will sprout in the spring.
Once you’ve removed all the old plant material, it’s time to till your soil and amend the soil with compost. I always get a lot of questions from customers about tilling and amending the soil. The most two common questions are: Should I till the soil first and then add compost? Or, should I add compost and then till the soil? The answer depends on the soil.
Usually after you’ve pulled the old vegetation out of the ground, the soil is fairly loose. If that’s the case, put about two inches of compost on the top of the soil and mix it into the soil as you’re tilling it down to about 6 to 8 inches. If the soil is compacted, till the soil first to loosen it up, add the compost, and then till it again down to about 6 to 8 inches.
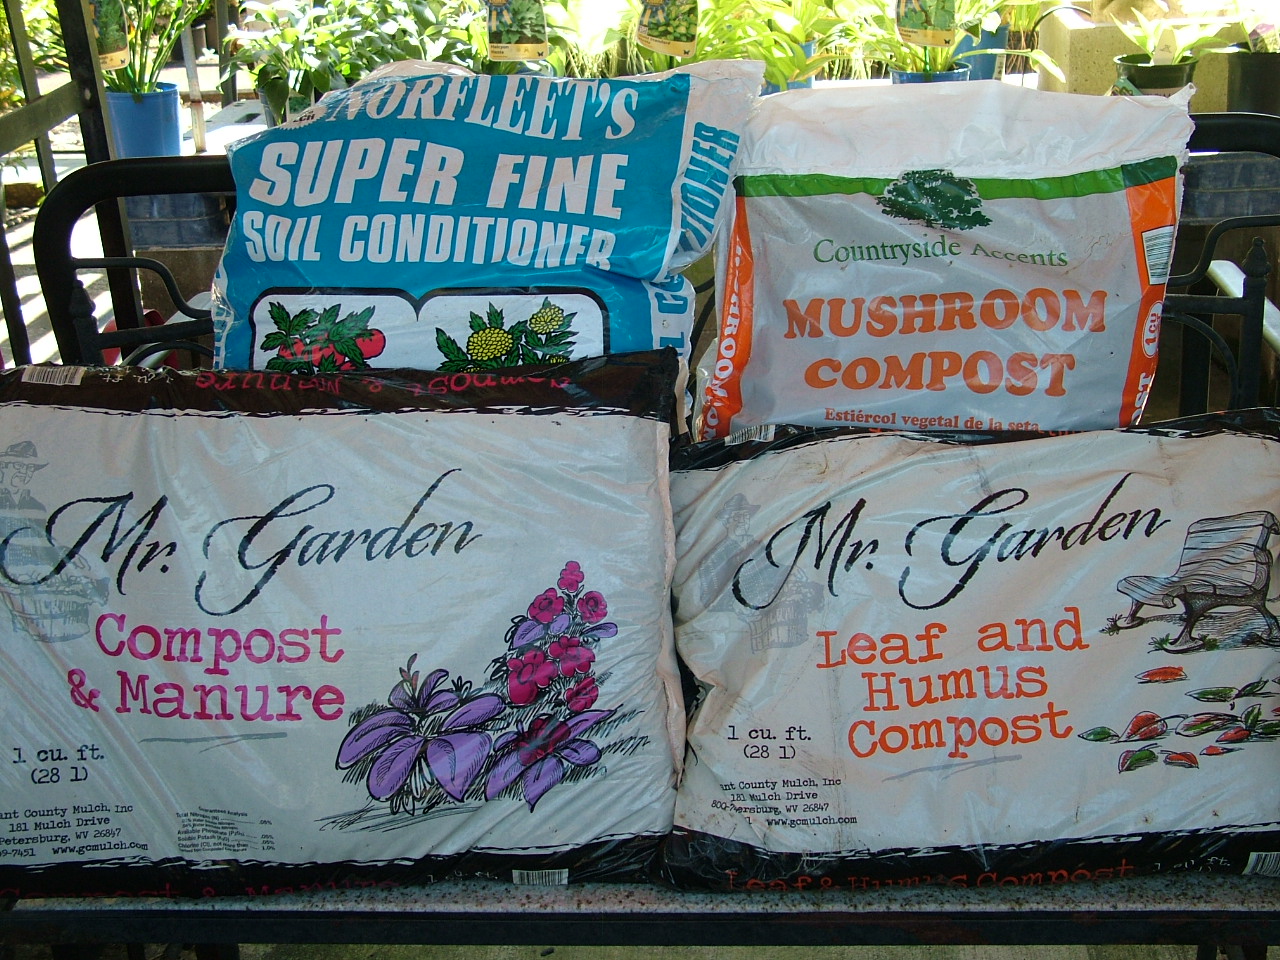 There are several types of compost which are good for your garden.
*Mushroom compost – made from the debris of mushrooms,
*Leaf compost or Leaf Gro,
*Manure, or
*Your own compost.
For a vegetable garden to grow well, you want the pH level to be between 6.0 and 7.0. If you did a soil test and found that the pH was less than 6.0, say around 5.7 of less, you may also want to add lime. You can use either the same lime you use for your lawn. This lime is called agricultural lime or calcitic lime. Or if you need more magnesium in your garden soil, use dolomitic lime which is often sold as Garden Lime. Both will help bring the pH in your soil to the proper level. However, only the dolomitic lime contains magnesium.
You may also need to fertilizer your garden at this time, especially if you were growing tomato plants, which take up a lot of nutrients from the soil. It’s best to put down any fertilizer at the same time you put down the compost and the lime. You want to till it into the soil as well. I would recommend either a fertilizer where all the numbers are the same (such as a 10-10-10) or where the middle number is higher (such as a 5-10-5).
Once the garden is ready, you can decide on what cold crops, or cool season vegetables, you want to plant.
Cold crops vary from leafy vegetables to root vegetables, and also bulbs. Some of the most common leafy vegetables are various forms of lettuce, kale, and mustard greens. Some of your most common root vegetables are carrots and radishes. And, the most common bulb to plant this time of year is your garlic.
Another question that I often get is: Is it better to plant seed or plant actual plants, which we call transplants?
The general rule is that root vegetables, such as carrots, beets, and radishes do better when you sow the seed directly into the ground. Other leaf vegetables, such as spinach and mustard greens also do well when you sow the seeds directly into your garden. But if you don’t want to sow those seeds directly into your garden, you can purchase them as plants. You can also purchase cauliflower and other vegetables.
Most of the crops will mature between 40 to 60 days. Some of the crops will do all right when the first light frost occurs, which can be at the end of October here in Northern Virginia. Other crops will do well with the temperatures going down to 20 degrees.
One of the biggest mistakes that people make when they sow seeds is that they sow them too deep and or in soil that is too moist.
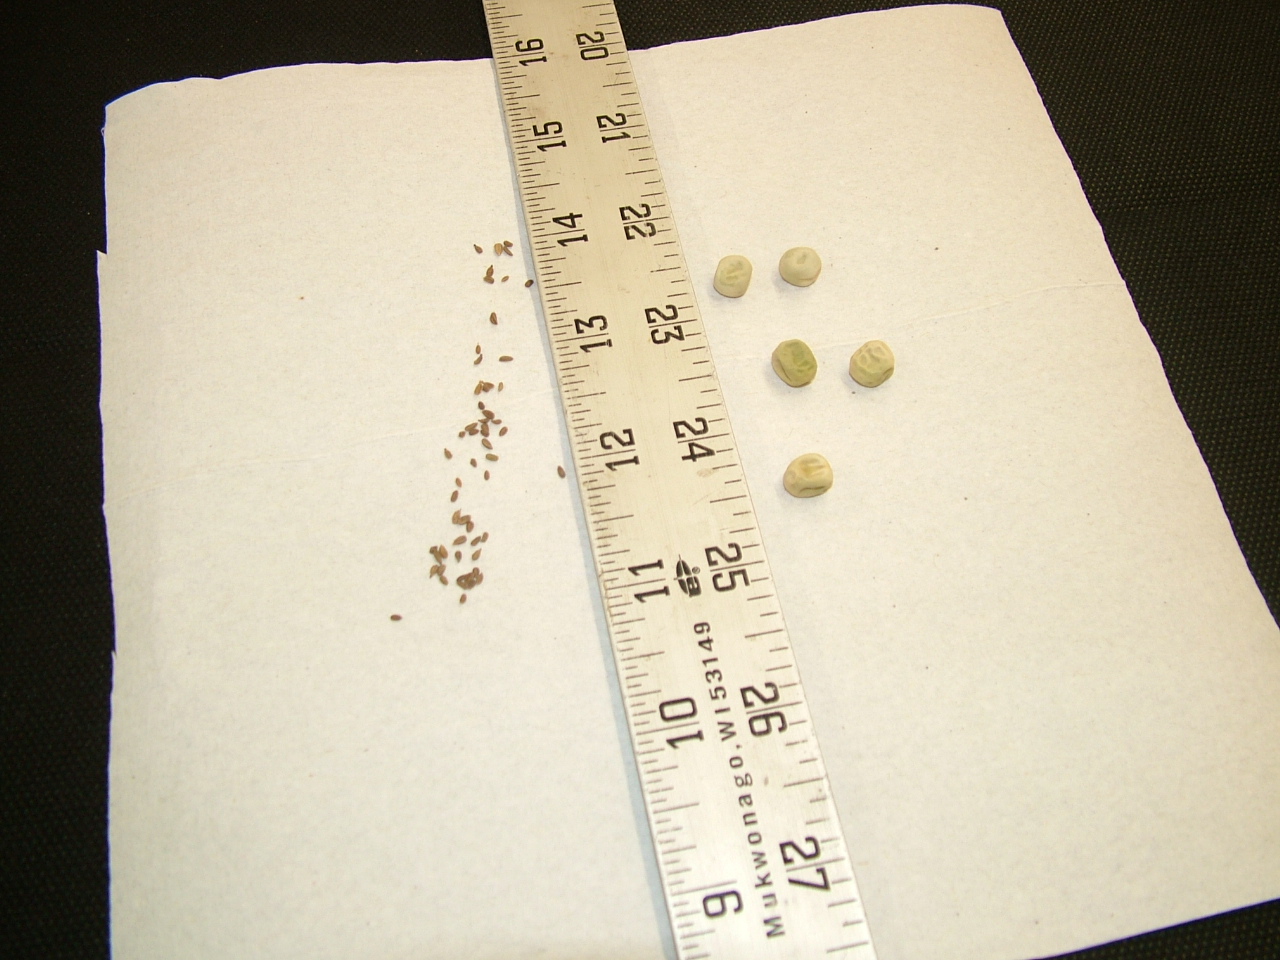 Most of your vegetable seeds are very small and look like herbs you might use for seasoning. In the picture to the right, the seeds on the left side of the ruler are carrots seeds. They are only about 1 mm (or 1/16” inch) in size. Meanwhile, the seeds on the right side of the ruler are pea seed which are about ¼” in size.
These small seeds will be planted directly into the soil, but if you want increased success with your pea seeds, pre-germinate them before planting.
Pre-germinating your pea seeds means that you put the seeds on a damp paper towel and fold the paper towel to cover them. Do this overnight. After that, plants the pea seeds into the ground. By softening the outer skin of your pea seeds, you’ll increase the success of their germination.
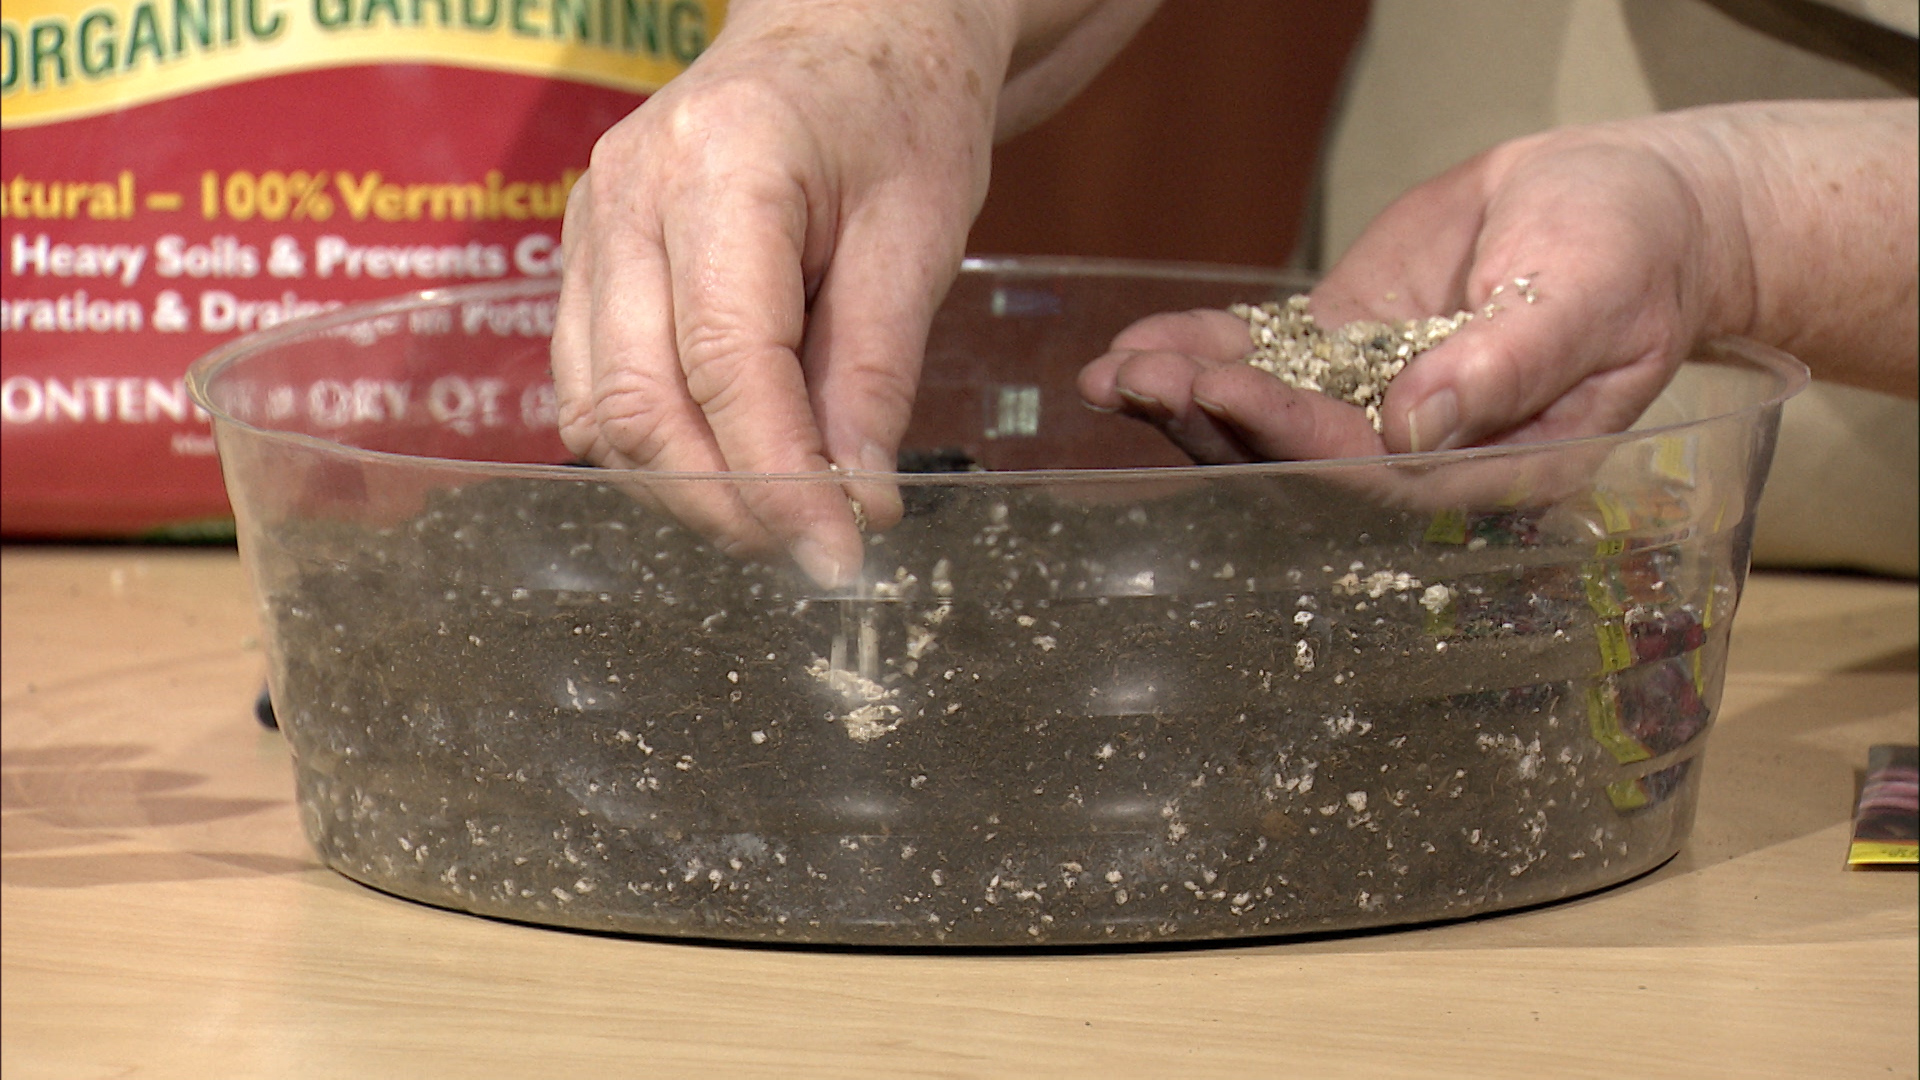 When you sow the small seeds directly into the ground, use a pencil, screwdriver, or other thin stick to create a furrow that’s no more than half-an-inch deep. Before you plant the seed into the ground, place some vermiculite into the furrow. Then plant your seeds and cover them gently with soil. After you plant your seeds, be sure to water your garden so the soil is moist. Keep your soil moist until you see the seeds sprouting. It can take anywhere from 7 to 21 days for various seeds to sprout. There is one hint about carrots. Because carrots can take up to 21 days to sprout, you may want to plant some radish seeds near the carrots so you don’t forget where they are.
Planting transplants is a lot easier. You just take the plants and put them into the ground. Once you’ve planted the transplants, keep the soil around them moist. They need one inch of water a week. When watering, water the soil and not the actual plant if at all possible. That will prevent any fungal diseases from occurring.
Garlic is a great plant to grow in the fall. And, they grow very successfully in Northern Virginia. The only problem with garlic is that you need some patience. Where you’ll be able to harvest your other cold crops before winter sets in, you won’t be able to harvest the garlic until July of the following year.
The garlic “seed” is actually the clove of a garlic bulb. You can either purchase your garlic “seeds” from Burke Nursery and Garden Centre or any organic farmer at a local Farmer’s Market. There are two types of garlic: hard neck garlic and soft neck garlic. It’s important to know the difference between the two. During the growing season in spring and until you harvest the garlic, hard neck garlic grows a stalk, called a scape. This scape needs to be cut off during the growing season. It’s edible and can be used in the same way you’d use any garlic in your food. But if you don’t remove the scape, it will grow a little bulblet at the top of the plant, and the garlic in the ground will stop growing. You don’t need to worry about this with soft neck garlic.
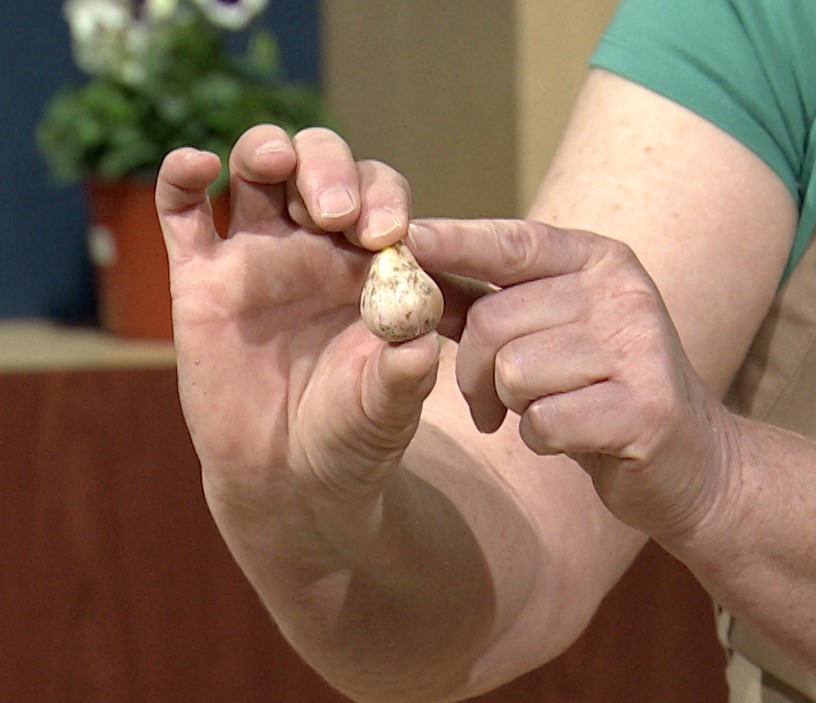 When you get your garlic bulb, pull the cloves apart. Don’t break the skin of the clove. If you do you may get an infection into the clove and a bulb may not grow. Cloves, like all bulbs have a growth tip and a base where the roots will grow.
Be sure to plant the tip up and the base down. Don’t plant the garlic bulb more than one inch down. Any deeper and you’ll have trouble harvesting it in July. Once planted, water the area and apply at least 4 inches or straw or hardwood shredded mulch.
As your garden is now planted for fall, you can extend some of your crops by using burlap, old sheets, plastic milk jugs, or frost cloth (also called harvest cloth). Most of the leafy vegetables, such as lettuce will survive the first light frost which often occurs at the end of October in Northern Virginia. Other cold crops, such as Brussel sprouts, cabbage, radishes, collard greens, and kale can actually survive in temperatures down to 20 degrees F. If you hear there is going to be a hard frost, cover your crops that evening. Make sure to remove the cover during the day time when the temperatures get warmer. Just never use plastic. This can trap unwanted moisture during the evening hours and injure your plants.
By following these tips, you’ll continue to enjoy the harvest of your garden well into the early months of winter.
List of most common cool season vegetables (cold crops)
- Beans
- Beets
- Broccoli
- Brussel Sprouts
- Cabbage
- Carrots
- Cauliflower
- Garlic
- Kale
- Kohlrabi
- Lettuce
- Mustard Greens
- Onion
- Peas
- Peppers
- Radish
- Rutabaga
- Spinach
- Swiss Chard
![pumpkin[1]](/wp-content/uploads/2013/03/pumpkin1.png)
![197454109[1]](/wp-content/uploads/2013/03/1974541091.png)


Leave a Reply